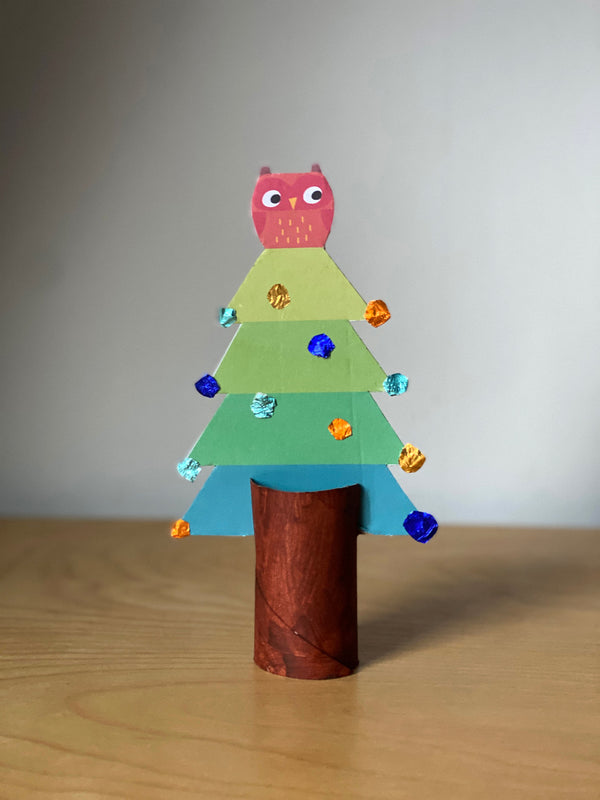
Simple Christmas tree craft

If you're looking to fill an afternoon this festive season, here's a delightful DIY project: creating your own mini Christmas tree. This simple craft is perfect for adding a touch of festive charm to your home while your child practices fine motor essentials like cutting and sticking.
We've used beautiful illustrations from our Stacking Fir Tree Toy to inspire this creation.
Please click on the link or the image below to access the free printable.
Materials Needed
To make your own mini Christmas tree, gather the following items:
- Toilet Roll
- Chocolate Coin Wrappers
- Glue
- Scissors
- Plain card
- Brown paint or brown pen
Step-by-Step Guide
Step 1: Prepare the Template
First, you will need to download and print out the free template provided. Once you have it, carefully cut out the tree from the printout and stick it onto the plain card.
Step 2: Create the Tree Stand
Next, it's time to create your tree stand. Colour your toilet roll with brown paint or a brown pen. Once dry, cut two slits into the top part of the toilet roll, about 2cm deep.
Step 3: Assemble Your Tree
Now you're ready to assemble your tree. Slot your cut-out tree into the slits of the toilet roll stand.
Step 4: Decorate!
Get creative with your decorations! We used chocolate coin wrappers to create some miniature baubles for our tree. However, you could also use sequins, or even leave it plain if you prefer a minimalist look.

Final Touches
Now all that's left to do is to place some miniature presents under your tree! For more fun ideas, see our Christmas crafts page. Why not put this tree in your doll's house and pile up some homemade presents underneath.


